After two years of work, with some CNC and 3D printing machines described here, I have released a first prototype of my DIY polyphonic modular synthesizers, called “Heritage Modular”.
The project is hosted here: Heritage Synthesizers


After two years of work, with some CNC and 3D printing machines described here, I have released a first prototype of my DIY polyphonic modular synthesizers, called “Heritage Modular”.
The project is hosted here: Heritage Synthesizers

Currently, the last Launchpad-X is not yet supported by FL-Studio 20.
I have developed a small Java application able to make it compatible with FL-Studio by converting Lauchpad-MK2 messages to Lauchpad-X format.
Tested only under Win10, but should work on other Windows versions, or MacOS.
You need to install a Virtual MIDI loopback software such as https://www.tobias-erichsen.de/software/loopmidi.html
Then, setup three Virtual MIDI ports as below:
[Launchpad-X] <=== [Java] <=== FL_to_LPX <=== [FL-Studio]
[Launchpad-X] ===> [Java] ===> LPX_to_FL ===> [FL-Studio]
[Launchpad-X] ===> [Java] ===> LPX_to_FL (Native) ===> [FL-Studio]

Connect your Launchpad-X.
Then you need to install and run the Java application: https://github.com/f1oat/Launchpad-X-gateway
Configure it as below:

If you have used the exact recommended names for loopMidi configuration, the Java application should select automatically the right ports. Otherwise, you will need to do it by hand by using the drop down menus, and click “Apply”.
Before launching FL-Studio, you can now click on “Connect” button. As a result, all pads should now become dark. If not, that means you have a configuration problem.
Then, launch FL-Studio. You have to make the connection to the loopMidi virtual ports and declare a “Launchpad MK2” device as below:

Note:
When everything is configured, you can load a performance mode song.
You should see pads getting several colors according to the Playlist.
Also, you should see the same colors on the Java application:

You can now play with your Launchpad-X. The behavior will be the same as for MK2. See description here: https://forum.image-line.com/viewtopic.php?t=147179
The “Native” radio button can be used to make the Lauchpad-X going back to power-on status, and send MIDI messages in “Note mode” or “Custom mode”. MIDI messages will be received by FL-Studio on port 3 for our configuration example. When you are in native mode, you can no longer use the performance mode.
Enjoy!
Time to machine some aluminum clamps for a nice vise.
To be used on the palet of my Intelys C3000.
First time I am using 3D printing to check the part before wasting material and time with CNC milling: very useful, let me fix some design flaws before machining!


A good friend of mine gave me an Inca 260 bandsaw.
Unfortunately, the original miter gage has been lost.
Found a good design on thingiverse (www.thingiverse.com/thing:505852) that I have tuned for this machine.
This derivative design is available from here: https://www.thingiverse.com/thing:3679405


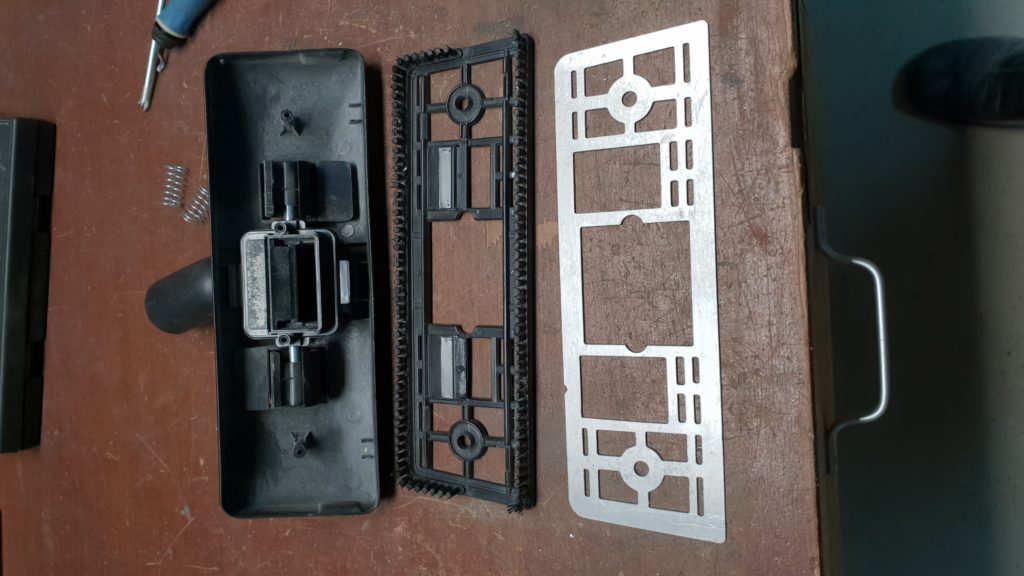
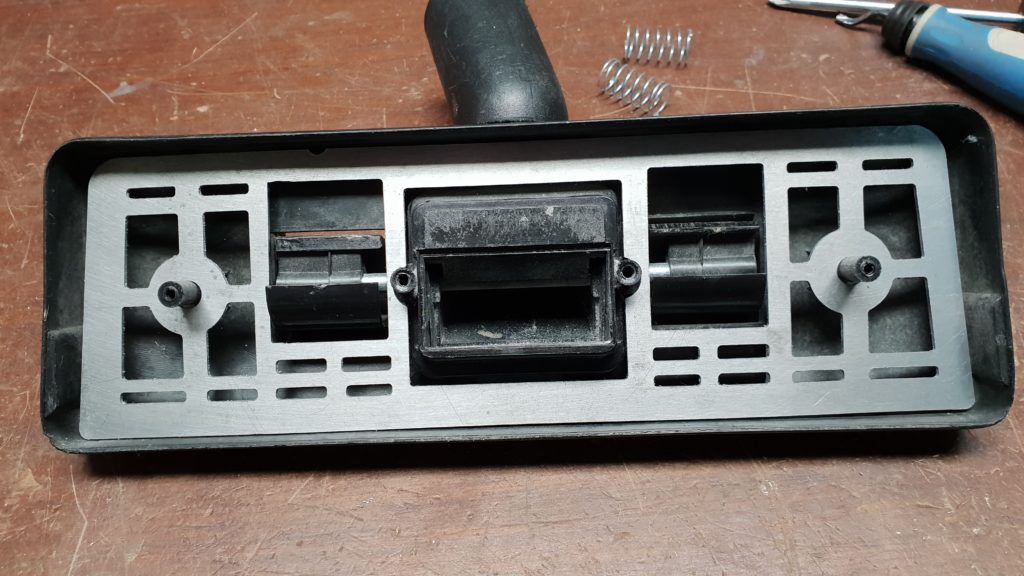
The retractable brush for my vacuum cleaner is broken.
Fixed with an aluminum plate machined on my CNC-6040.
CAD done with ViaCAD, and CAM with BobCAD-CAM.


I needed this feature for my lathe control panel project. The goal is to drive the jog steps size by the rotation speed of the jog wheels.
The algorithm has been validated from 5 Hz to 100 kHz.
Maximum measurement error is 1%. See curves below.
The patch is available here: https://github.com/f1oat/machinekit
loadusr -w ../setup.sh

loadrt threads name1=servo-thread period1=1000000
loadrt hal_pru_generic prucode=$(HAL_RTMOD_DIR)/xenomai/pru_generic.bin pru=0 num_encoders=1 num_pwmgens=1 pru_period=2500 halname=hpg
addf hpg.update servo-thread
addf hpg.capture-position servo-thread

setp hpg.encoder.00.chan.00.A-pin 7 #925 ENCxI
setp hpg.encoder.00.chan.00.counter-mode 2 #Up Counter (counts rising edges on A, always counts up, B ignored)

setp hpg.pwmgen.00.out.00.pin 921 #PWM1
setp hpg.pwmgen.00.out.00.enable 1
setp hpg.pwmgen.00.pwm_period 1000000
setp hpg.pwmgen.00.out.00.value 0.5

start
loadusr -w sleep 1
loadusr -w python encoder_test.py
#!/usr/bin/python

import subprocess
import time
import os

def readpin(p):
 r = subprocess.check_output('halcmd -s show pin ' + p + '|head -1',shell=True)
 lst = r.split()
 return lst[3]

def setpin(p, v):
 subprocess.check_output('halcmd -s setp %s %d' % (p, v), shell=True)

freq = 5.0
prev_freq = 0.0
maxerror = 0
f = open('result.csv', 'w')
line = 'in(Hz), out(Hz), err(%), latency(ms)'
print line
f.write(line + '\n')
time.sleep(2)

while freq < 100e3:
 period = int(1e9/freq/2500) * 2500 # because pru_period=2500
 real_freq = 1e9/period
 if (real_freq <> prev_freq):
 prev_freq = real_freq
 setpin('hpg.pwmgen.00.pwm_period', period)
 time.sleep(0.2)
 measured_freq = float(readpin('hpg.encoder.00.chan.00.velocity'))
 latency = float(readpin('hpg.encoder.00.chan.00.latency')) * 1e-6
 error = abs(real_freq / measured_freq - 1.0)
 maxerror = max(maxerror, error)
 line = "%8.1f, %8.1f, %4.2f, %3.0f" % (real_freq, measured_freq, error*100.0, latency)
 print line
 f.write(line + '\n')
 freq = 1.1*freq

f.close()
print "Max error %.1f%s" % (maxerror*100.0, '%')
The HD5000 is fully integrated in a Gmoccapy panel.
I have added widgets for focus/zoom control. The zoom feature is done with “util.crop” camunit module.
See http://wiki.linuxcnc.org/cgi-bin/wiki.pl?Adding_Digital_Zoom_To_Camview-Emc for full description.