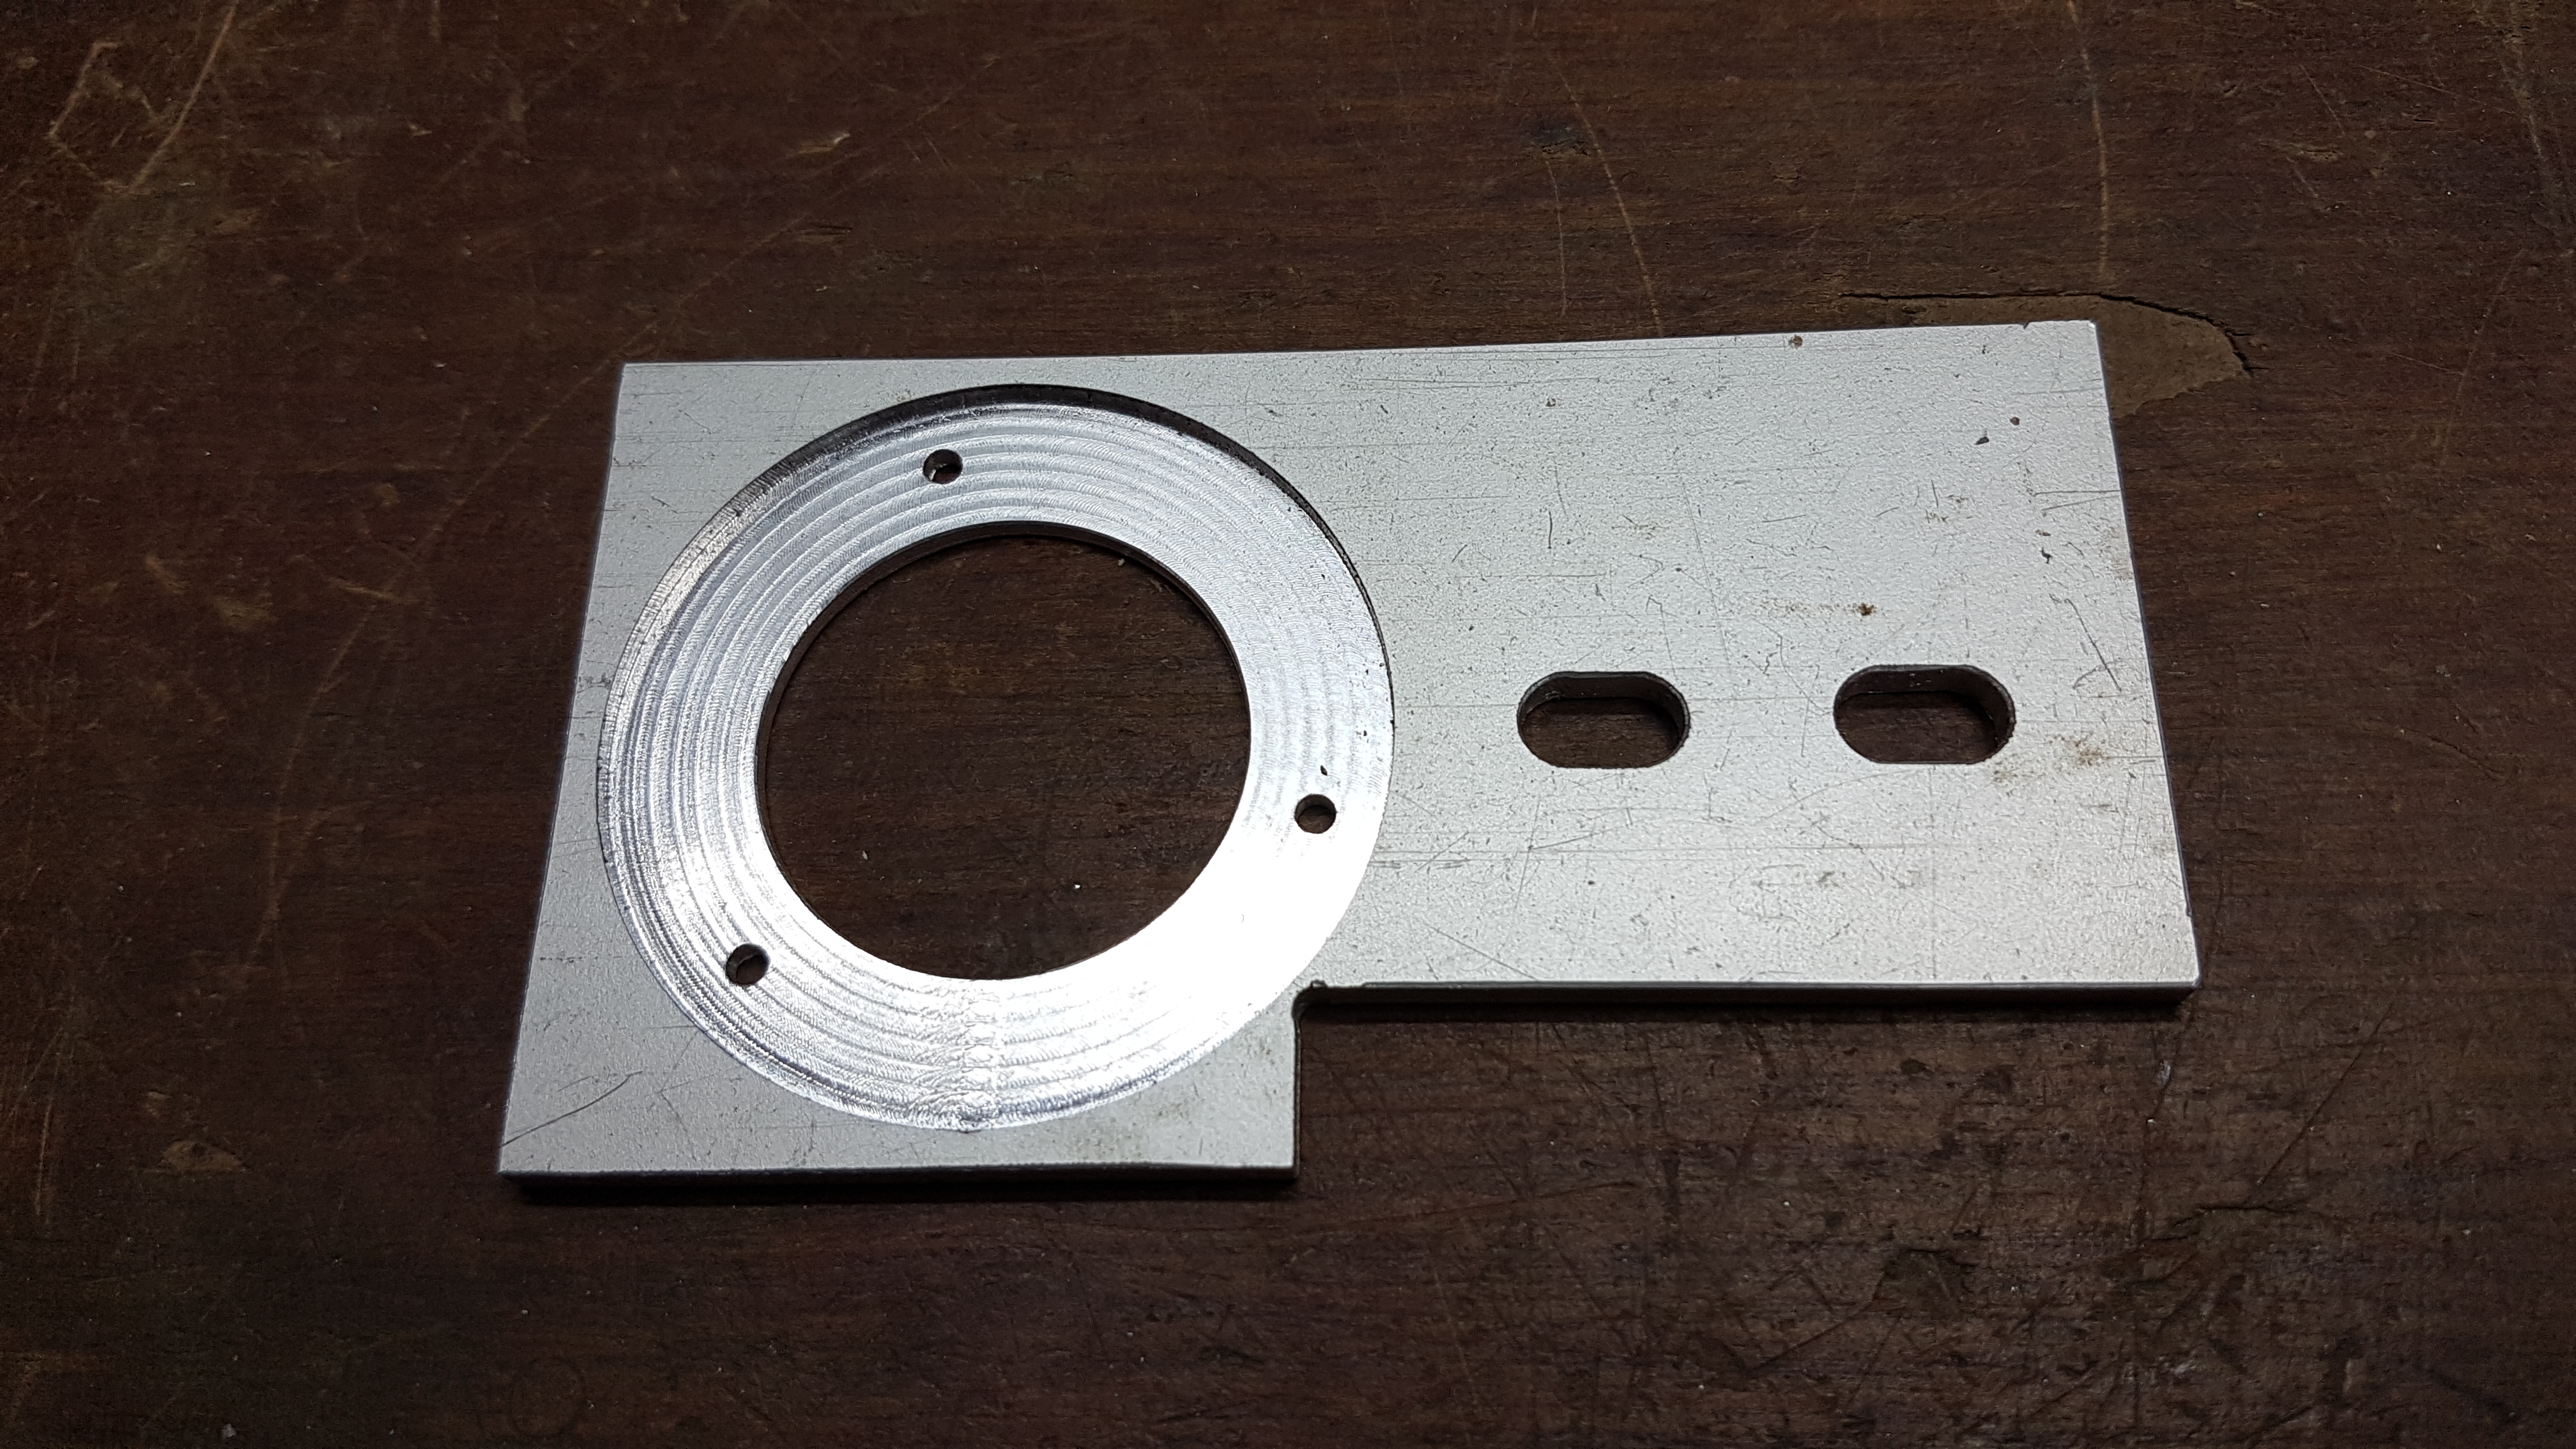
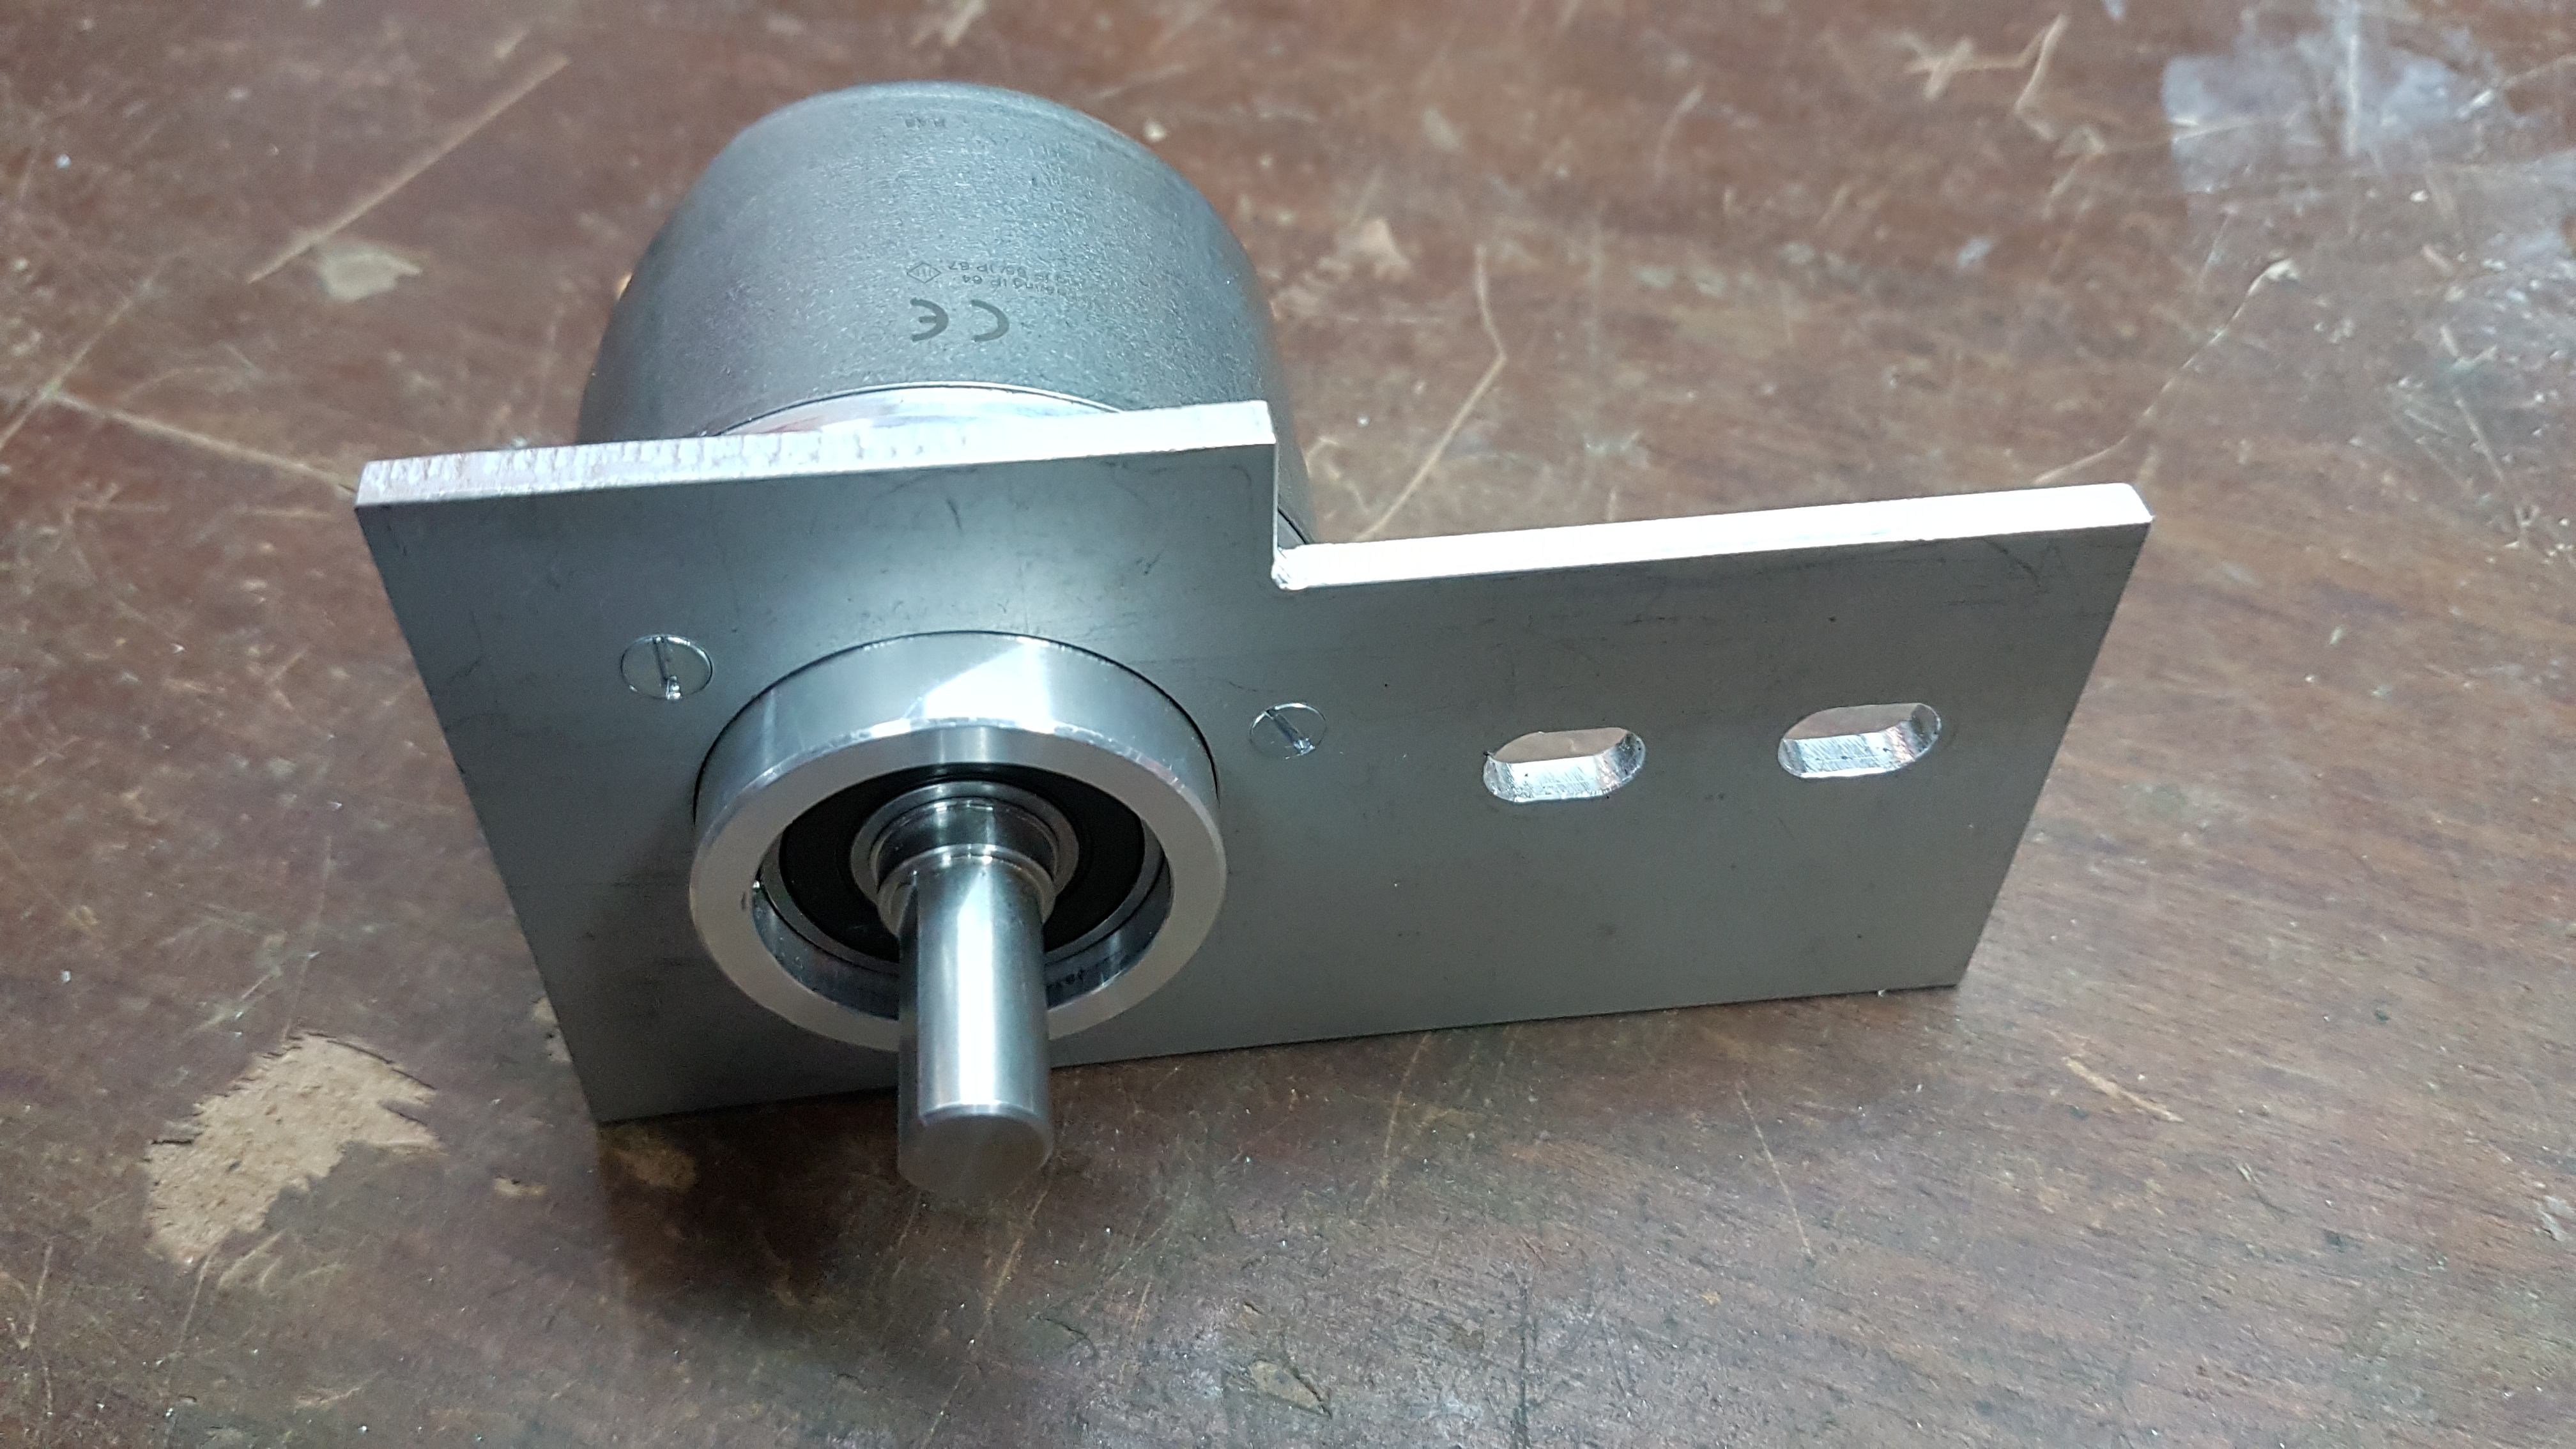
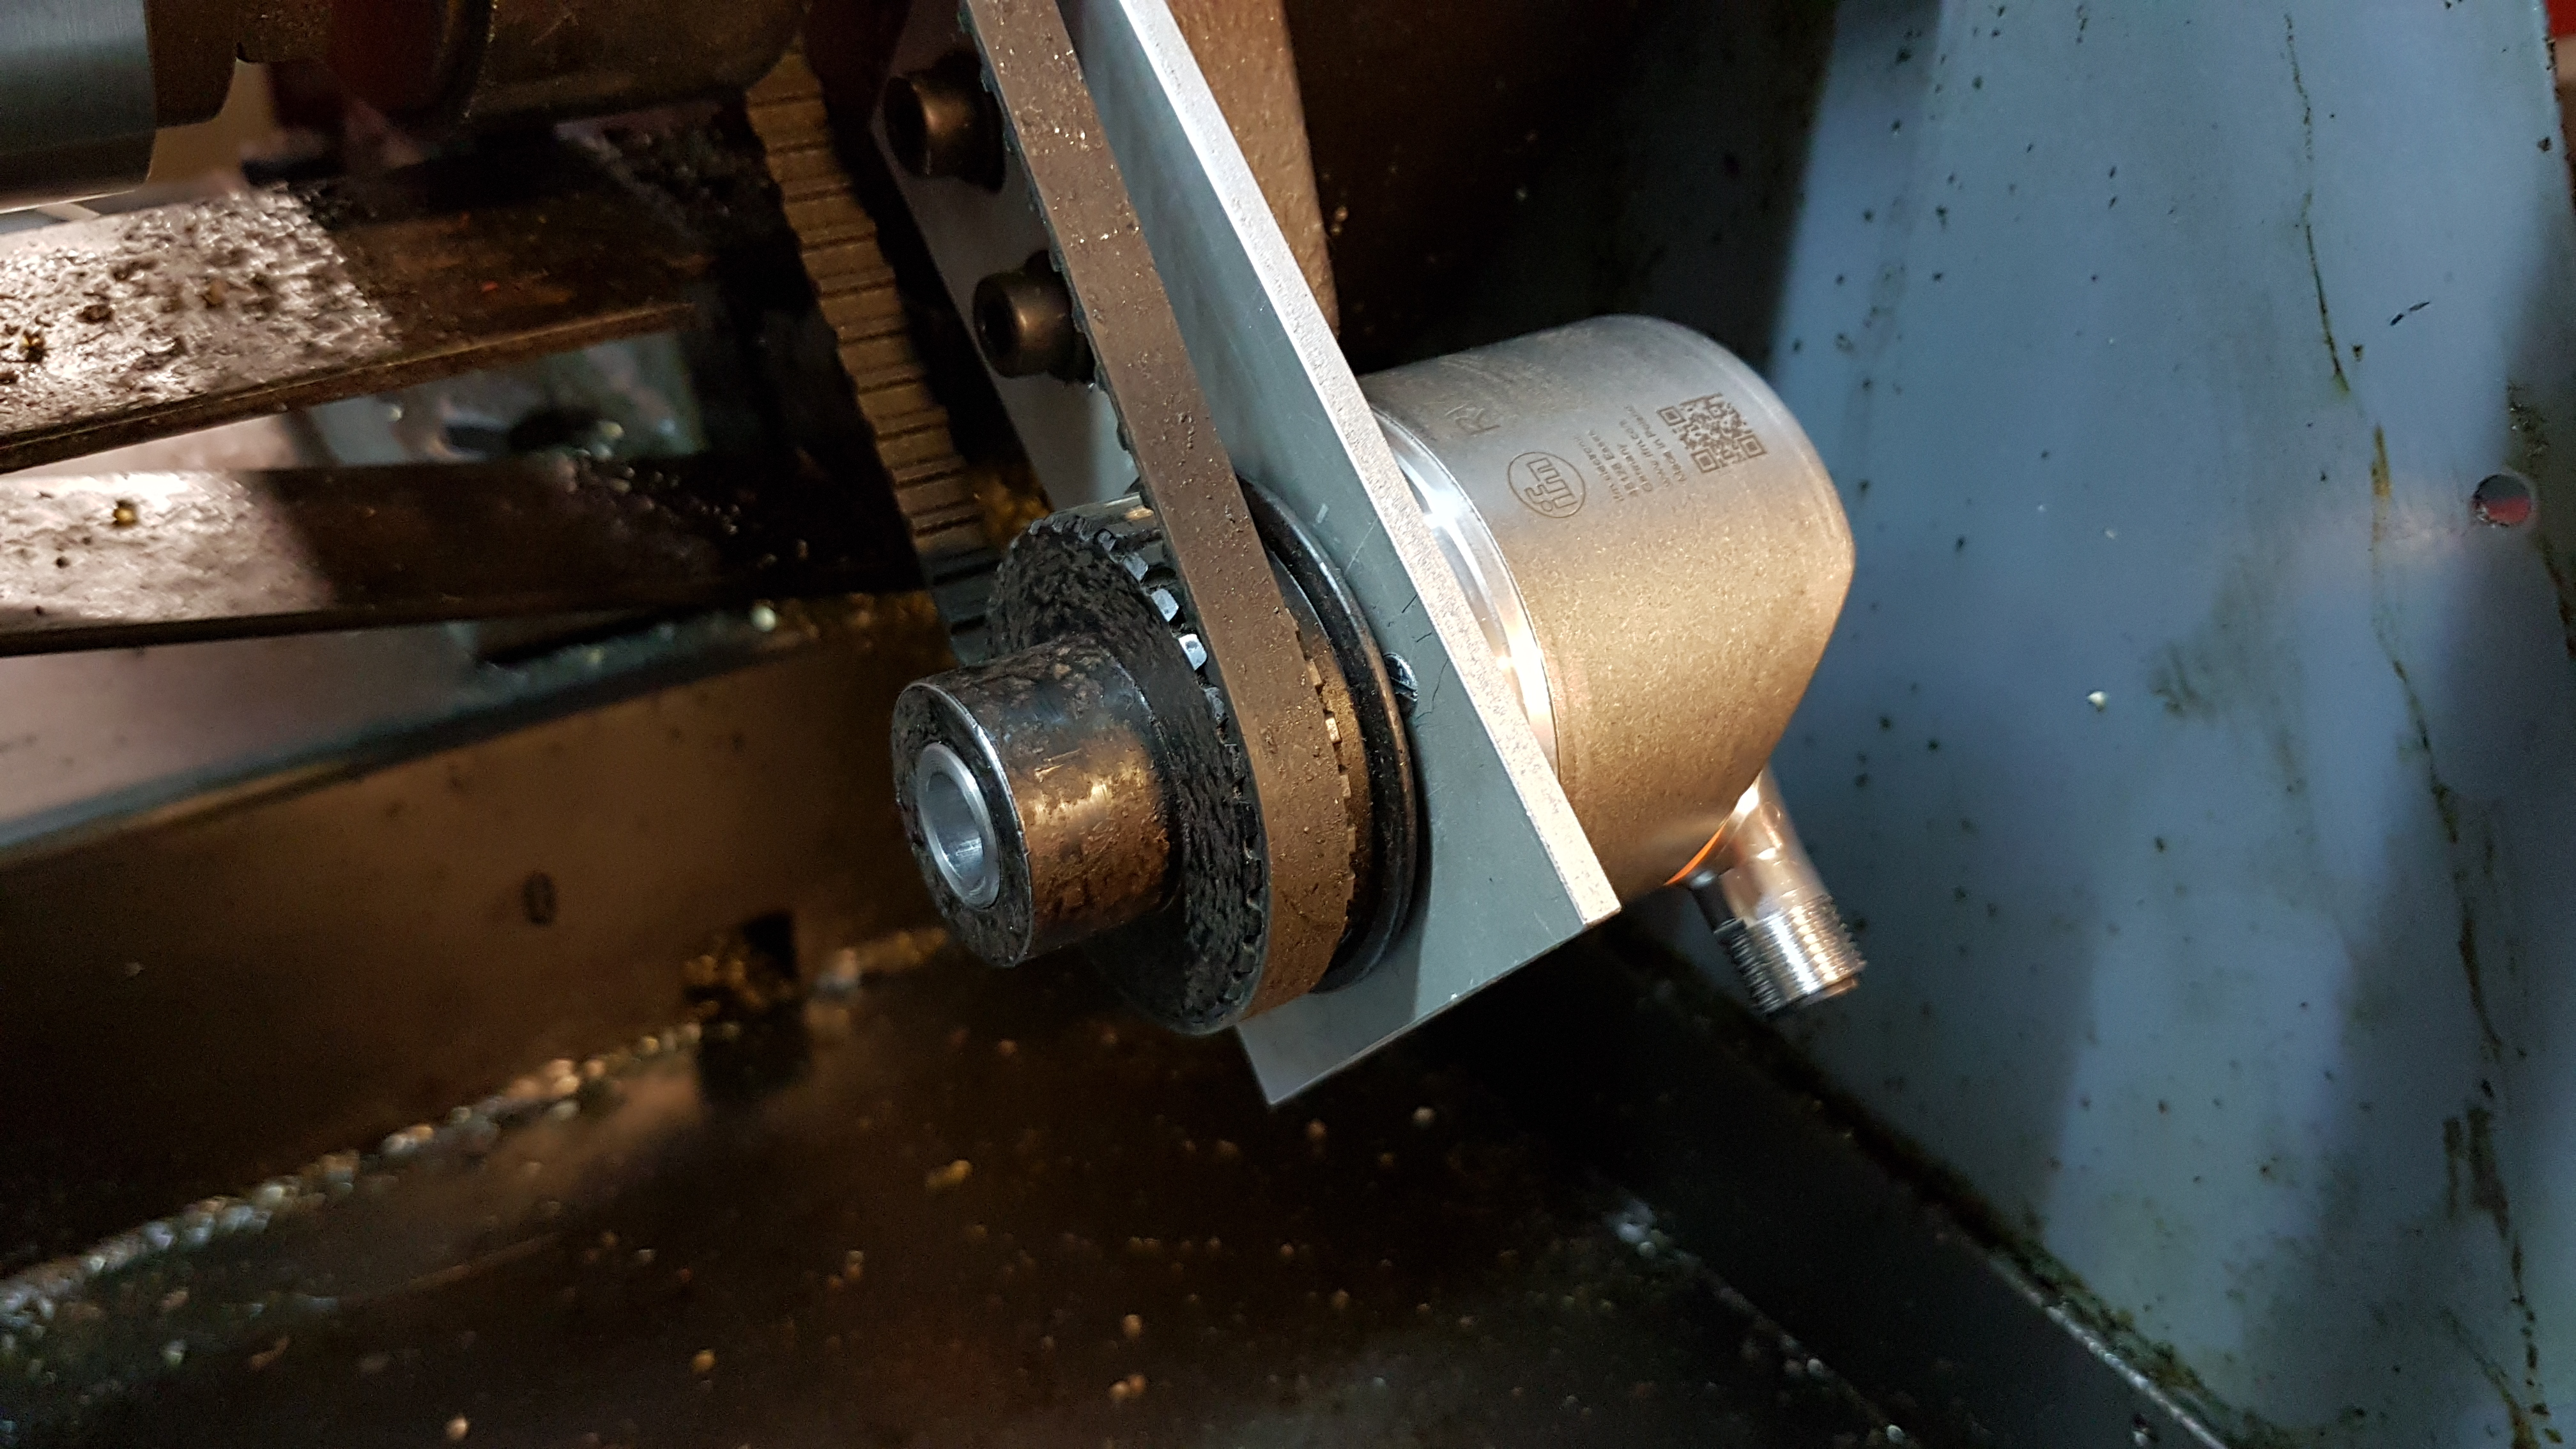
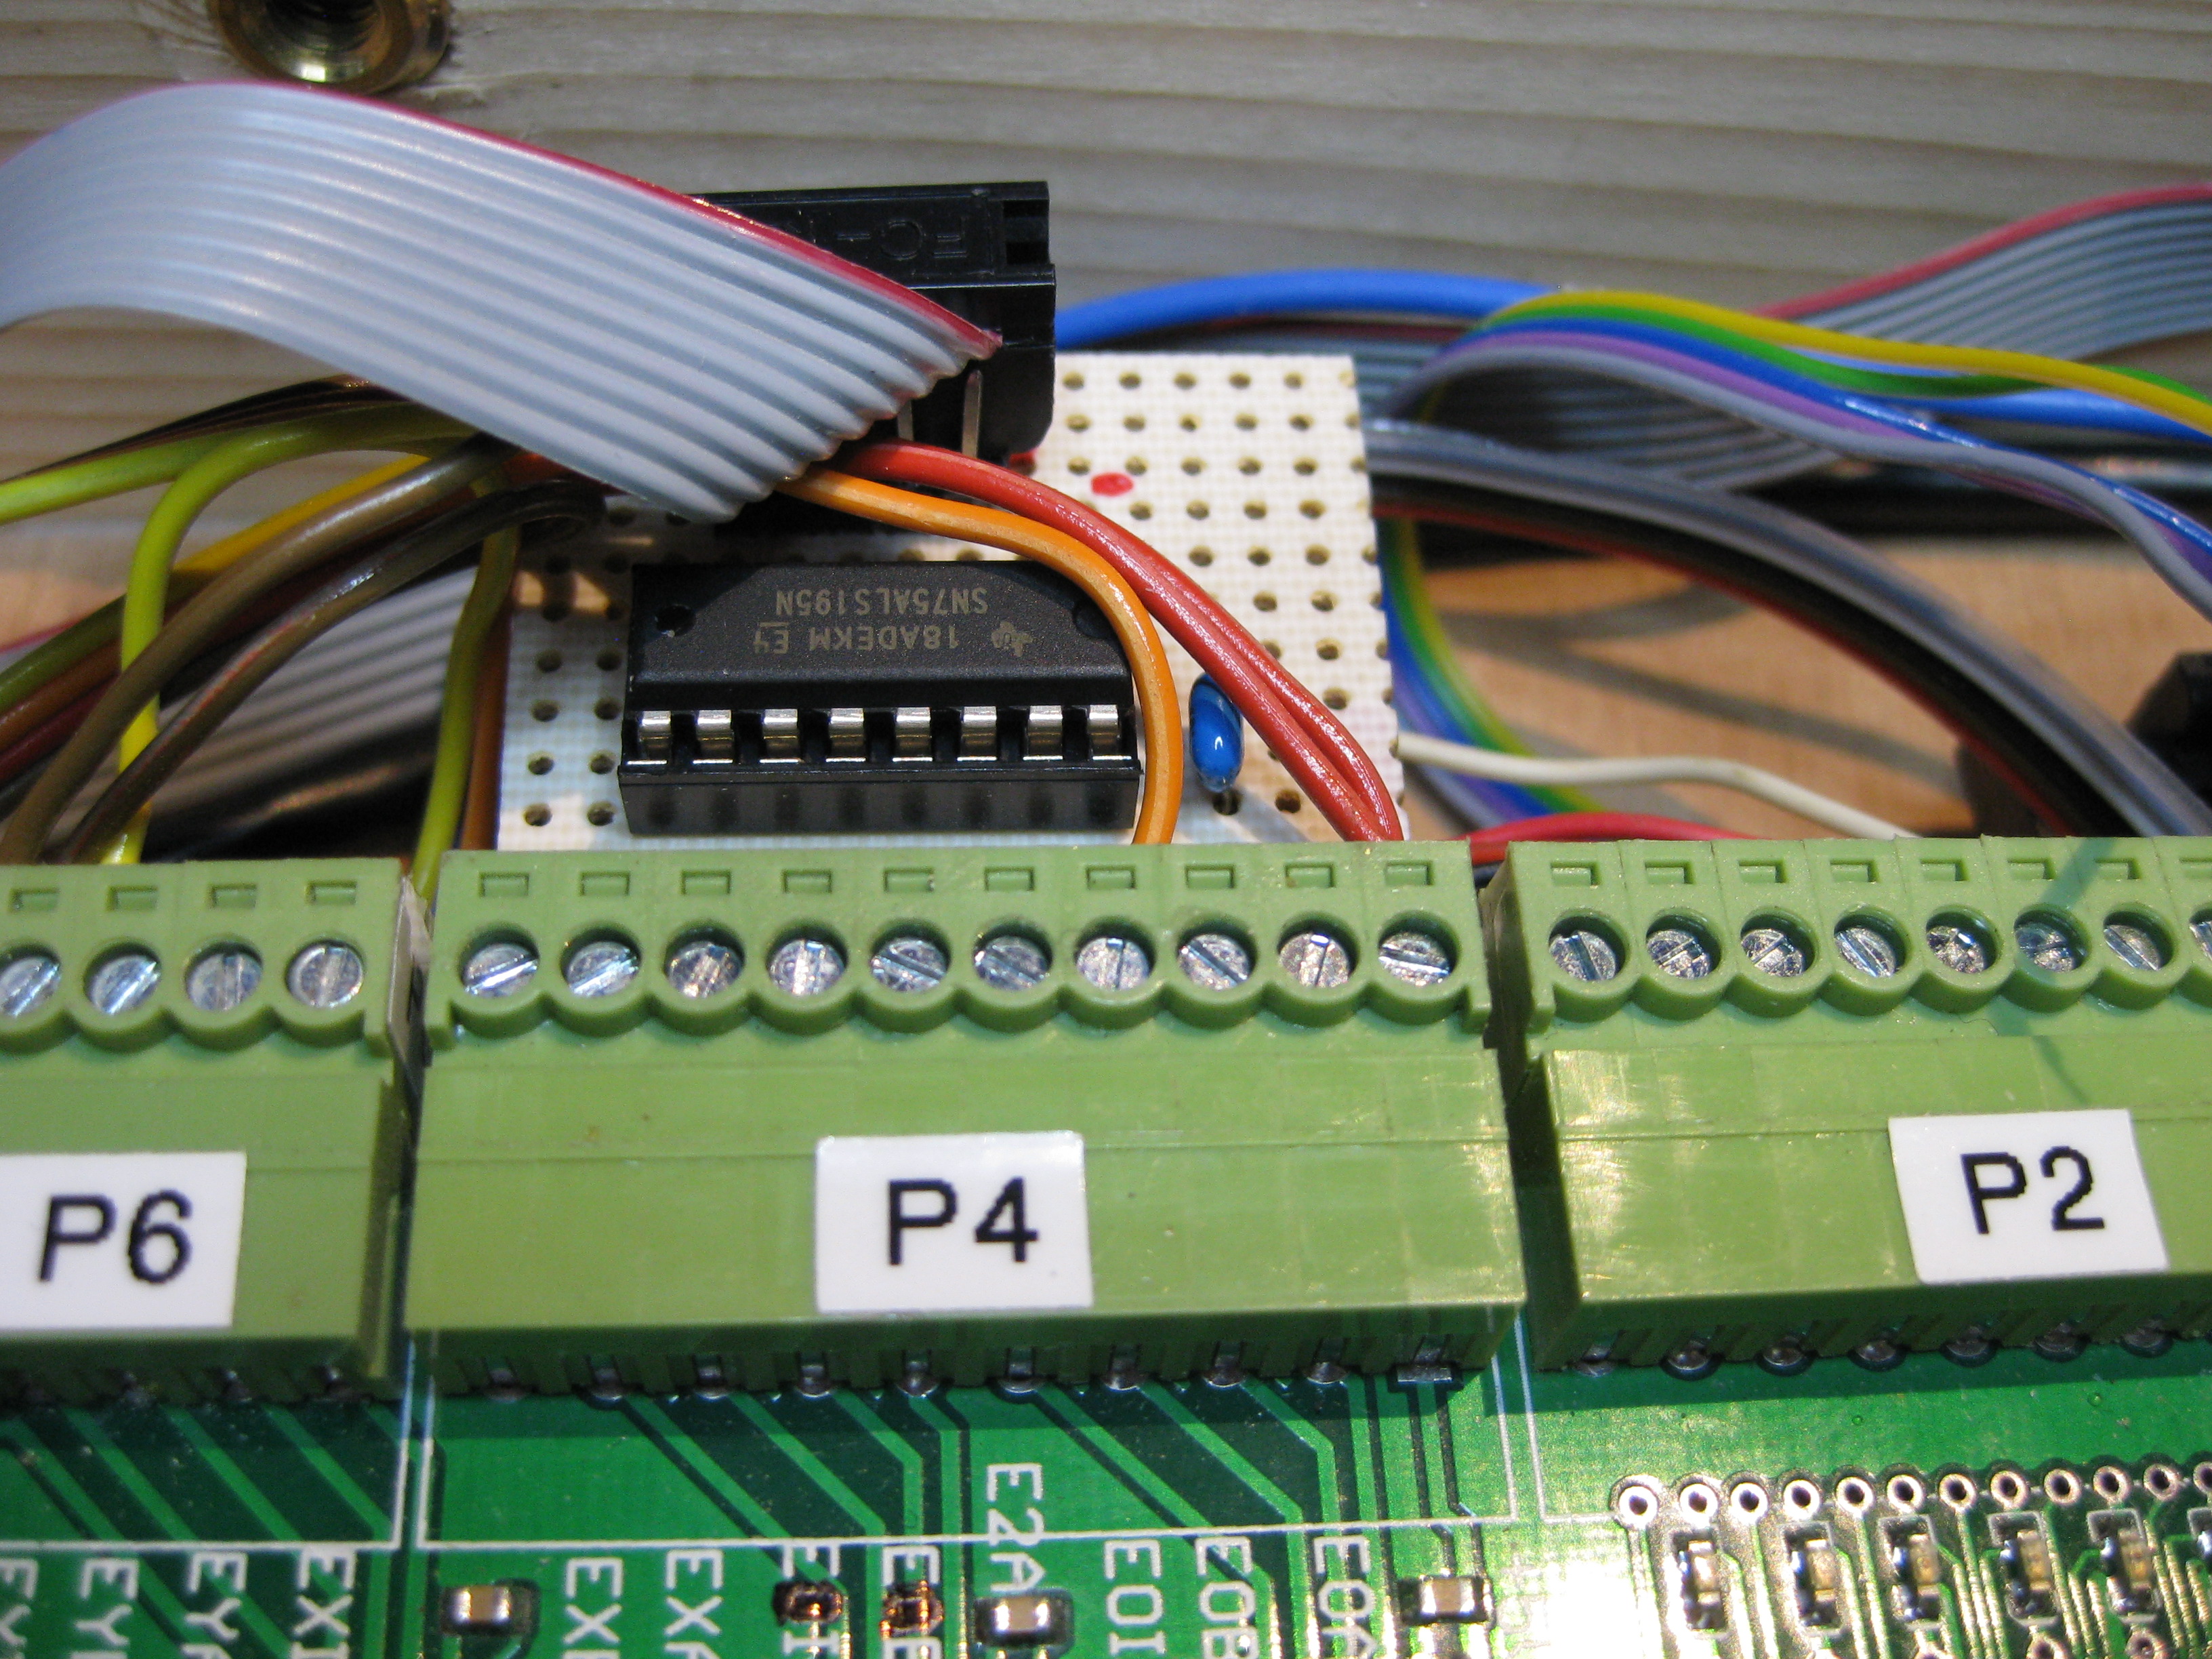
Mounting of a new spindle encoder with high resolution (1024ppr) and quadrature output. The encoder is a RVP510 from ifm.
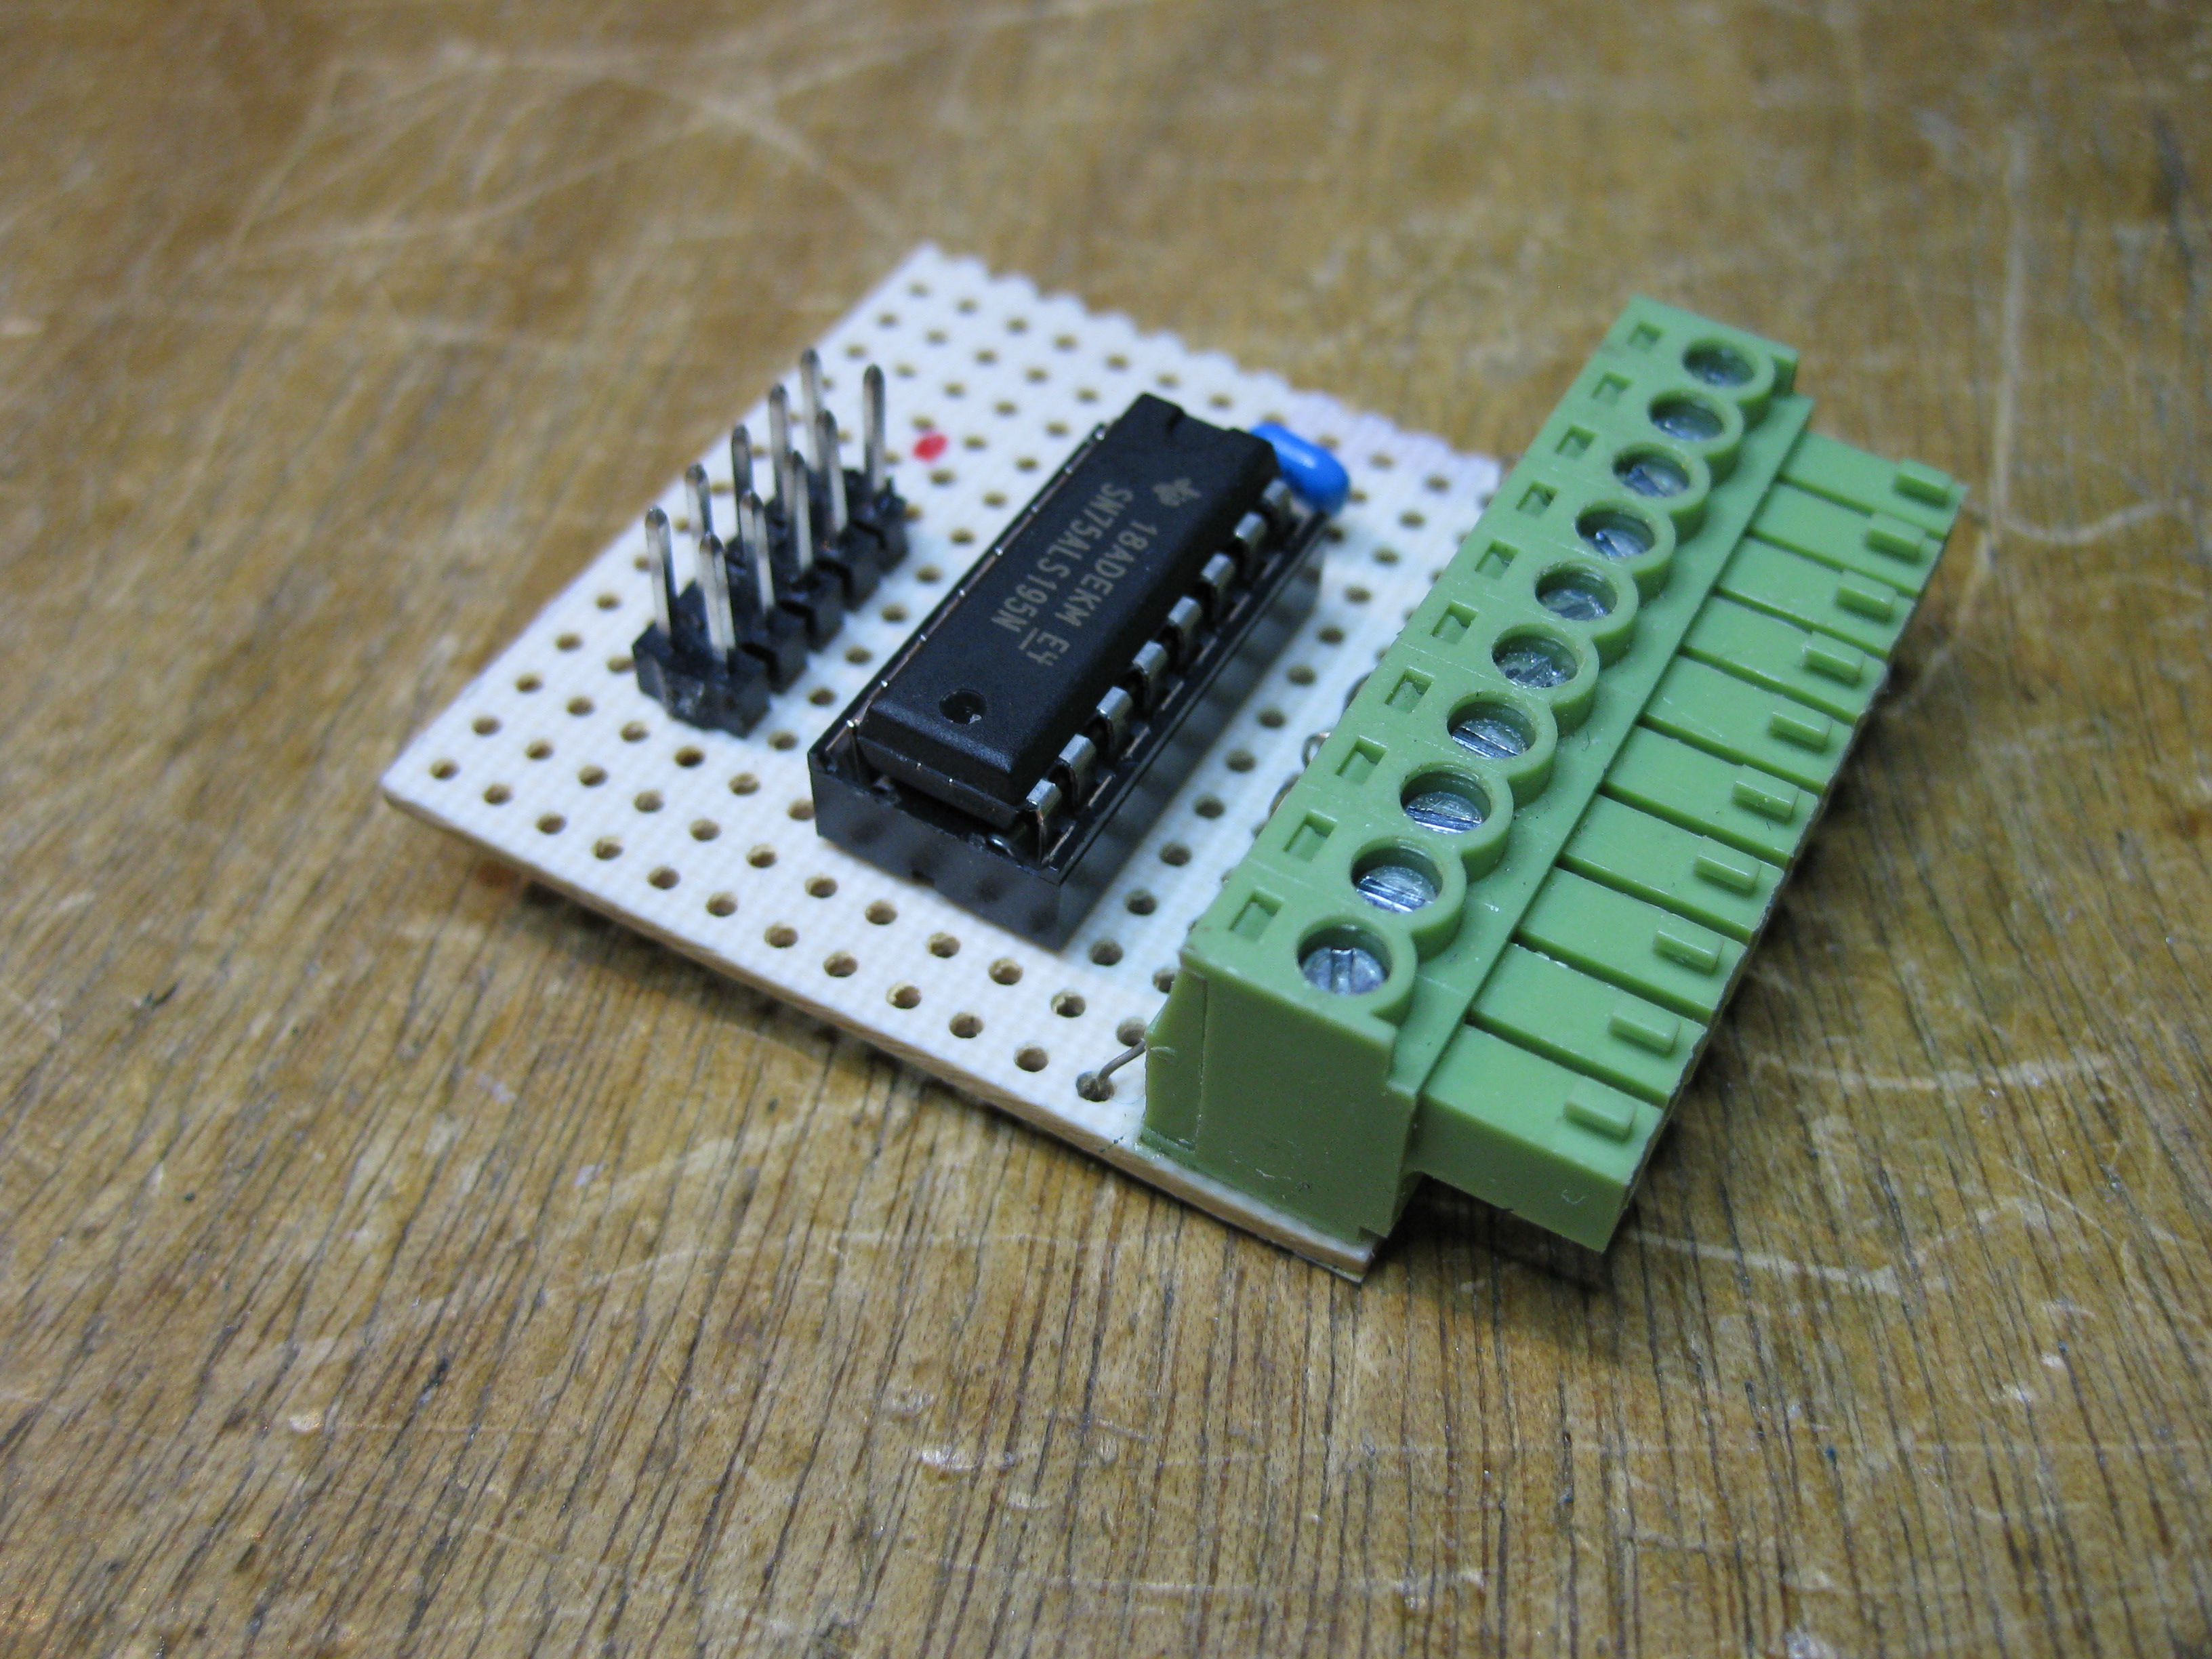
RS-422 to TTL level conversion with a 75ALS195N

Mounting of a new spindle encoder with high resolution (1024ppr) and quadrature output. The encoder is a RVP510 from ifm.
RS-422 to TTL level conversion with a 75ALS195N
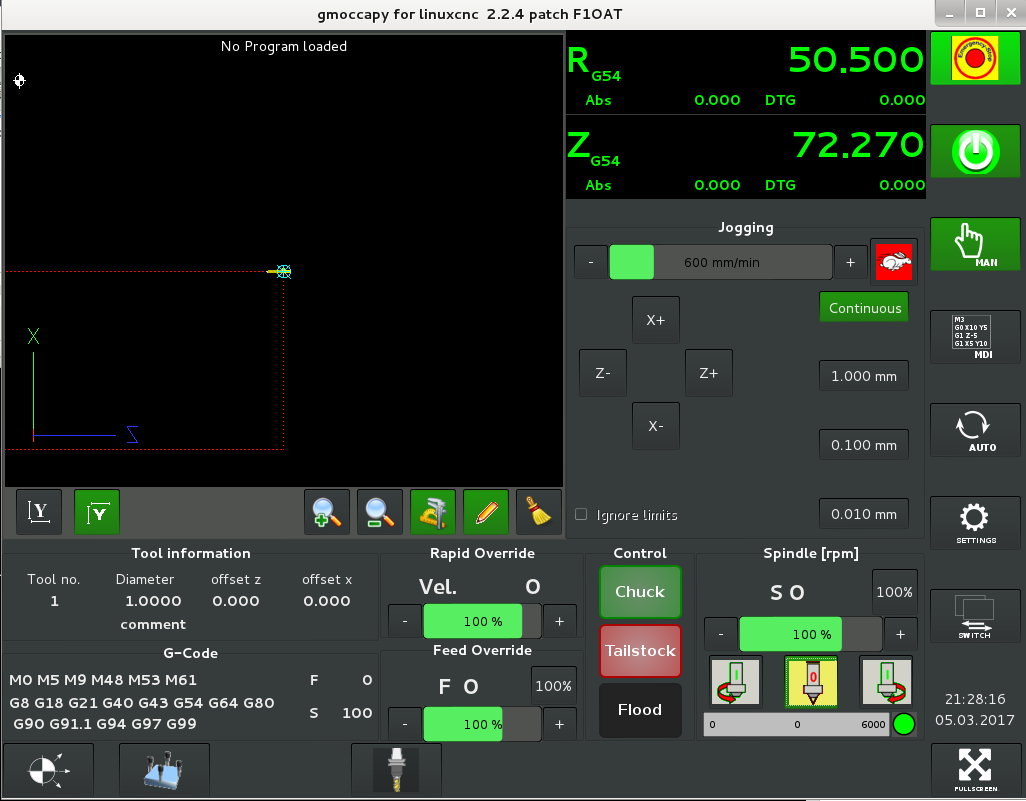
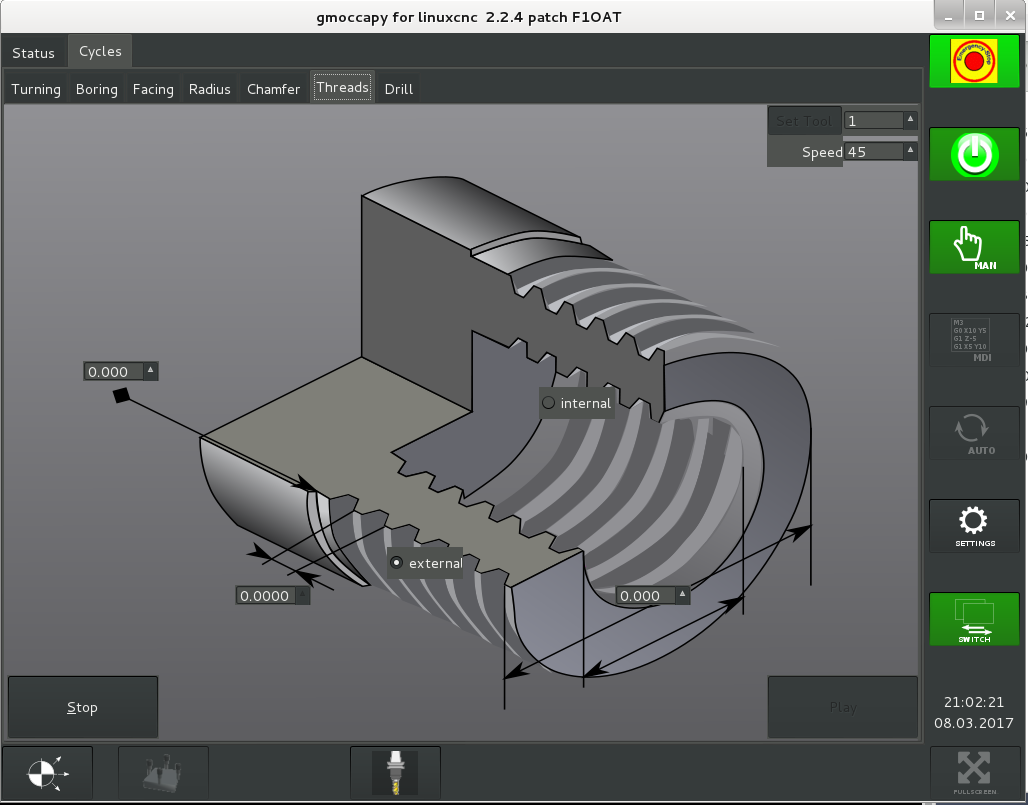
Work in progress: a dark theme for Gmoccapy!
This is a DIY controller for the original Emco Turn 120/220 toolchanger.
Software, PCB and schematic are now available at: https://github.com/f1oat/EATC-120
Many thanks to Tom for the original Toolerator 3000 design that inspired EATC-120.

The little support for the lever of the door switch is broken.
Trying to glue it without success.
So, I switched to a 3D printed spare part! 


Slicing with Simplify3D

The 3D printing job
The EATC-120 module is almost finished !

This is a driver for the EmcoTurn 120/220 original 8 positions ATC.
This design is derived from the excellent Toolerator 3000 USB controlled driver.
EATC-120 is adding MODBUS capabilities for easy integration with an industrial environment.
Single 24V power supply with embedded 5V DC/DC converter.
The “brain” of the module is an Arduino Micro.
The motor is driven by an LMD18245T providing current control.
The lock status is automatically detected by measuring the peak current when the motor stalls.
Everything is reported in MODBUS registers.
Integration with Machinekit/LinuxCNC is easy thanks to “mb2hal” HAL component.
I have found a nice empty DIN rail enclosure and designed a special PCB to fit with it.


I need to finalize integration and test with my Emco lathe before publishing.
Stay tuned !
Just built a strong bracket for the control panel.
The door can slide freely under the panel.
Nest step is electrical cabling of the link between the control panel and the motor controllers.


VFD and stepper drivers installed in the electrical box.
Vexta driver autotest feature shows that motors are in good condition and 5 phases cabling is ok.
Need to integrate the control panel for further validation.

I have replaced the Probotix cape by a Furaday cape to get more I/O pins.
Here is the updated schematic diagram:

Brainstorming, CAD, CAM, simulation, wood, machining, gluing, sanding, HIPS … the control panel is almost ready!
The structure of the control panel is made of 5mm plywood. The red color is coming from a 1mm sheet of HIPS. Everything machined on my CNC-6040 router with 3.17mm carbide endmill.
The touchscreen is a Beetronics 12″ model. Connected through HDMI to the BeagleBone Black board. Easy configuration: there is native support for the touchscreen USB pointing device in the Machinekit Linux image!

First step was CAD design with ViaCAD software.
Some 3D rendering with ViaCAD.

High quality CG rendering and compositing with DAZ3D Carrara 8.5.On the real machine, I will add a frame to hang the panel above the sliding door area.

CAM done with BobCAD-CAM. Below a simulation to check everything before machining.![BobCAD-CAM - [Emco120 Control Panel V14 Cover]_2016-03-20_13-56-58](https://blog.f1oat.org/wp-content/uploads/2016/03/BobCAD-CAM-Emco120-Control-Panel-V14-Cover_2016-03-20_13-56-58.jpg)
Plywood panel machined with 3.17mm carbide endmill. Some pockets to have 2mm thickness for industrial buttons fixture.


Gluing all parts together, and waiting 2 hours before removing clamps. Final result!
MPG and lights will be managed by an Arduino UNO. Stay tuned …
The knob to lock the door of the electrical accessories box was broken. After an hour of CAD, here is a brand new one 3D printed with PLA material !

