The knob to lock the door of the electrical accessories box was broken. After an hour of CAD, here is a brand new one 3D printed with PLA material !


The knob to lock the door of the electrical accessories box was broken. After an hour of CAD, here is a brand new one 3D printed with PLA material !
My new project is the retrofit of an Emco Turn 120P CNC lathe.
For the motion controller, I have chosen Machinekit running on a Beaglebone Black board. 12″ touchscreen with Gmoccapy GUI. A Controllino PLC to manage all non-realtime I/O such as the pneumatic chuck, the tailstock, the pumps, etc …
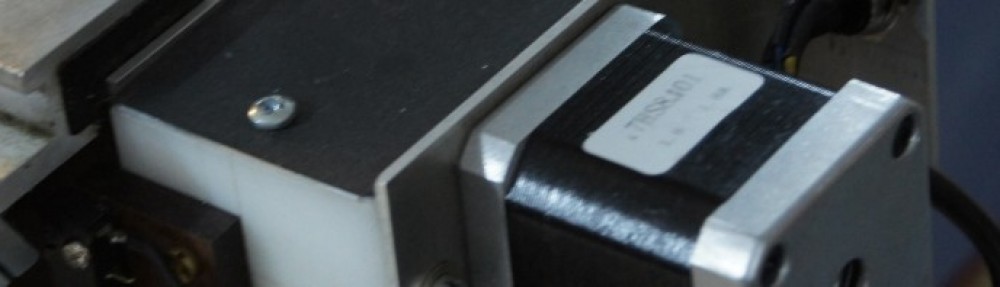
The original 5-phases stepper motors has been kept. They are driven by two Vexa UDK5128N drivers. Need 110V AC source for them, coming from an auto-transformer.
The original spindle DC motor has been replaced by a 3 kW AC motor driven by an Hitachi NE-S1-022 VFD. This VFD is controlled over MODBUS by the Machinekit controller through the PLC. I have patched the standard MODBUS over TCP stack to have a gateway to the RS485 bus.
Here is the global schematic diagram of the electronics.

Next step is the modification of the Probotix PBX-BB cape to give access to the eQEP2 quadrature encoder for the spindle position sensor.
The Wino-board is very interesting for IoT home projects. It is an Arduino tiny board including Wifi interface.
The pitch of the connectors is 2mm to optimize the footprint. But this is not so easy to use with 2.54mm pitch common breadboards. So, I have designed a small adapter to convert from 2mm to 2.54mm pitch.

Here is the PCB machined on my CNC-6040. The label is not finished because the mill broke during the engraving.
The fully assembled adapter board with the Wino-board device soldered on the top.
Full project including Gerber files and Target 3001! design : Winoboard adapter V05.zip
After trying to implement auto bed leveling feature with a retractable switch, I decided to use a small induction sensor. I experienced poor mechanical reliability with the retractable switch mostly because the PLA bracket was melting when the 2 extruders were hot.
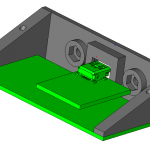
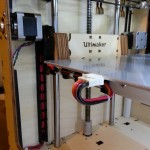
I have modified the original hot end holder design by Ultimaker so that a support plate for the induction sensor can be tightly screwed.

Here is the original design compared to the new one

Original design

New design
The induction sensor is a TL-Q5MC1-Z from Omron. Even it is rated for 10 to 30 VDC power supply, it works very well down to 2.5V, including the embedded red LED indicator. The detection distance of the aluminum plate is about 2mm. So I have replaced the 3mm glass plate by kapton tape to accommodate this short detection range.
The sensor is connected to GND, +5V and Pin13 of the Ultimaker controller board so that the ZMIN endstop switch is still active. Keeping the ZMIN endstop is useful for security reason in situation where the induction sensor does not work anymore, or the aluminum bed is not present.

TL-Q5MC1-Z connection (brown, blue, black wires)
I have modified the Marlin firmware as below:
The project resources are available here:
My first experience with Machinekit: the retrofit of an old Intelys C3000 machining center! Three months of work with many new things to learn:
Many thanks to the Machinekit and LinuxCNC community for helping me on some tricky configuration issues.
The customized Machineface GUI is available from https://github.com/f1oat/
BobCAD-CAM is able to manage multiple machine setups in the same project. This is a very useful feature when the workpiece should be cut in several phases with a different fixture for each of them. Below an example with 3 machine setups.
![BobCAD V26 - [Multi Setups]_2015-02-09_22-20-50](https://blog.f1oat.org/wp-content/uploads/2015/02/BobCAD-V26-Multi-Setups_2015-02-09_22-20-50.png)
The generated G-Code file contains all operations in the same file, except if you enable manually only one fixture. So, saving one different G-Code file for each machine setup is possible, but quite painful and risky.
To solve this issue, I have designed a custom BobCAD-CAM postprocessor and a dedicated LinuxCNC/Gmoccapy panel to select from one single G-Code file the operations to be executed for a given machine setup. Also, the Gremlin preview is automatically updated according to the selected machine setup. Here is a video showing how it works:
In the BobCAD-CAM generated G-Code file, the section associated to each machine setup is surrounded by if / elseif / endif statements for dynamic selection.
...
(Machine Setup - 1  Facing)
(FACING)
O100 if  [ #<_selected_setup> EQ 1 ]
T1 M6
G53 G0 Z#<_ini [ AXIS_2 ] SAFE_POSITION>
S15915
M3
G0 X60.150 Y-22.600
M7 (MIST COOLANT)
G0
(Machine Setup - 2  Pocket)
(POCKET)
M5
T2 M6
S3559
M3
M7 (MIST COOLANT)
G0
G0 X5.969 Y.000
G0 Z35.480
...
(NEXT MACHINE SETUP - Machine Setup - 2)
O100 elseif  [ #<_selected_setup> EQ 2 ]
T1 M6
G53 G0 Z#<_ini [ AXIS_2 ] SAFE_POSITION>
....
(NEXT MACHINE SETUP - Machine Setup - 3)
O100 elseif  [ #<_selected_setup> EQ 3 ]
....
G0 Z25.480
G0 Z55.800
O100 endif
M5
M30
The #<_selected_setup> is a custom named parameter linked to a Gmoccapy panel where the setup number can be selected from 1 to 6.
For those who are not using Gmoccapy or LinuxCNC, another option is to get the chosen machine setup by reading an analog input with a M66 statement.
I have spent some hours to configure properly my BobCAD-CAM postprocessor for good result. One tricky aspect is the tools management: if the tool does not change from one machine setup to the next one, the original postprocessor does not include any further tool change statements in the G-Code file. This is not compatible with my O100 if/elseif/endif hack because, the tool change sequence would be issued only for first machine setup. So, I have added a systematic tool change in the following section of the posprocessor:
16. Machine Setup Change
	" "
	"(NEXT MACHINE SETUP - ",setup_name,")"
	" "
	n,"O100 elseif ","[","# EQ ", program_block_5, "]"
	n,t,"M6"
	n,"G53 G0 Z#<_ini","[","AXIS_2","]","SAFE_POSITION>"
	n,s
	n,spindle_on
	n,rapid_move,force_x,xr,force_y,yr,rotary_xyr_angle
	n,program_block_1
	"G0"
	output_rotary_angle
I am not yet fully happy with this solution because I have some unnecessary tool change requests in some situations. But, at least it works, in any case!
I have now to test this modification on the real machine … Stay tuned!
This gallery contains 4 photos.
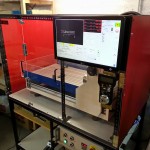
After few days of wood cutting, drilling, painting, 3D printing, etc … here the result: a brand new enclosure for my CNC-6040. No more safety glasses needed when running!
This gallery contains 7 photos.
The original CNC-Shop control box uses a 0-10V board to drive the VFD spindle speed. This is fully supported by LinuxCNC. However, it needs some tuning of the analog levels for proper operation and there is no feedback on the … Continue reading
This gallery contains 4 photos.
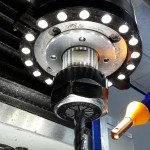
This lighting ring is designed for 18 white LEDs. To be mounted on a 2200W VFD spindle for a milling machine (80 mm overall diameter and 63 mm mounting location). With 12V power supply, group LEDs by 3 units in … Continue reading
This gallery contains 2 photos.
I have added a nice Jason HK heated bed to my Ultimaker Original. The cables are guided by a nice cable chain and remixed clips. See following links to get the STL files for you own printer: https://www.youmagine.com/designs/heat-bed-wire-clip-for-um-original-remix http://www.thingiverse.com/thing:247573